Addressable Pixels
For the last 5 years a wide variety of LEDs and associated technologies have been available to the public. In the past, if you wanted some LEDs you could grab individual LEDs and drive them using a micro controller. These would allow you to drive a long length of full colour pixels with amazing colour animations. These were great for decorative lighting, strip lighting, etc. However, you could only control one segment of strips at any one time.
Say you want to create a grid of pixels and control each one individually? This is where addressable pixels come in.
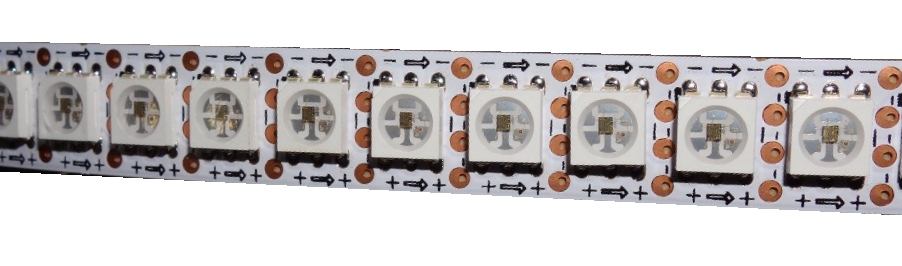
 The APA102 / SK9822 Addressable Pixel
These amazing little devices come in many variations , sizes, layouts, driving mechanisms, colour configurations etc but they all share some key aspects:
- Each one has 3 x Ultra Bright LEDs inside. Red, green and blue. There are also RGBWhite variants which will be discussed later.
- Each has a tiny IC (Integrated Circuit) built into the pixel that controls how the individual lights are activated.
- They can be daisy chained to create long complex systems.
- And more importantly, they can be individual addressed.
Now you can have a long strip of pixels where each one can be told what to do and how at very high frame rates. These usually come on a semi flexible copper strip in multiple configurations and widths. They can also be purchased on any size PCB in grids, circles, pretty much any configuration you can think of. Or individual!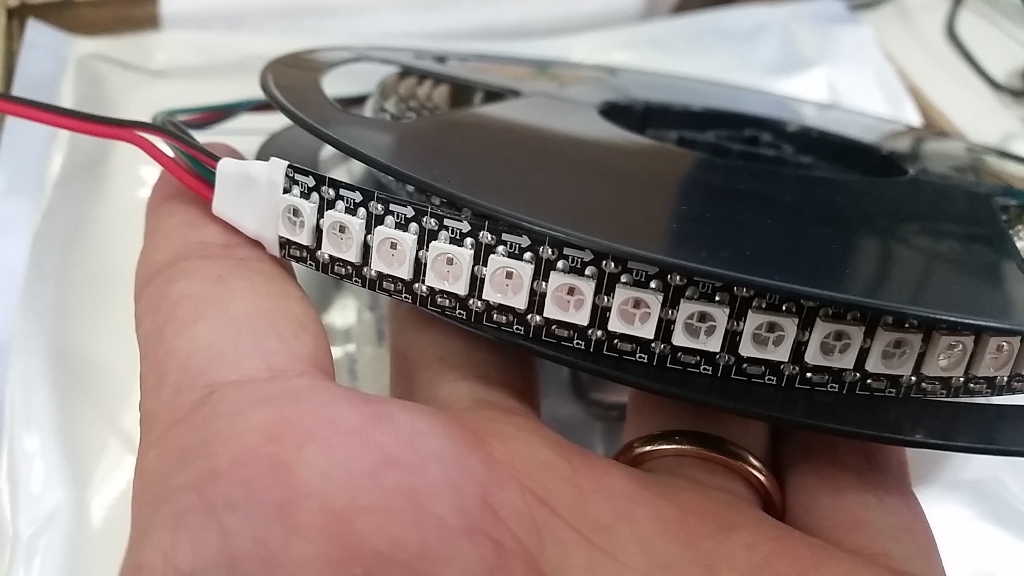 An example of some WS2812 pixels on a 12mm strip in 144 pixels per meter density
The many different types of pixels
Within this category of addressable pixels, come a whole bunch of different technologies. They differ in certain specific ways, and all have a use case
- The rate and method of physically controlling the individual RGB LEDs within the pixel
- The communication protocol used by a control device to speak to the pixels IC
- Levels of reduncancy
- Level of individual color and brightness control
For brevity I will describe the 2 most popular types of pixels. The end use case for this guide will then work with one specific type.
The 4 pin Addressable Pixel
These are 3 models of exactly the same technology. The pixels have 4 pins.
- Ground - connected to common ground on the power supply rail
- Data IN - connected to either your control device or to the data out of the previous pixel
- Data OUT - connected to the DATA IN of the next pixel
- +5V - Connected to common +5V on the power supply rail
These pixels use a protocol based on PWM (Pulse Width Modulation) to speak to one another.
Your control device sends a serial signal at a predefined speed (of around 800Khz, but this is slightly different for different models). The signal is an ordered list of bytes each representing the brightness level of each pixels RGB value. The order in which the bytes are sent, control the pixel that you plan to light up. For example if you had 3 pixels in a chain, in order to light up the pattern R G B, so that pixel 1 is Red, Pixel 2 is Green, Pixel 3 is Blue. you would send the following block of data:
[255 0 0] [0 255 0] [0 0 255]
These type of pixels are the cheaper variant of what can be purchased. They have a maximum transfer rate of 800Khz which becomes a limiting factor on large scale installations, specifically when your control device is having to transmit data to a very long chain of pixels.
The work around for this is to break up your installation into group of paralel output frame. For example. If you had a grid of pixels 100 strips wide by 100 pixel tall connected in a long daisy chain, it would take some time for all pixels to be updated and your refresh rate would be low. If you have a driver that was capable 10 x parallel output you could split your installation up into 10 blocks therefore increasing your frame rate.
Range of Available pixels in this family:
These can be purchase in a range of densities, width of strip and waterproofing level. Here are some generally used densities in NON Waterproof productions.
- 30 Pixels Per meter
- 60 Pixels Per Meter
- 74 Pixels Per Meter
- 96 Pixels Per Meter
- 144 Pixels Per Meter
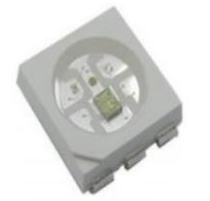
The 6 pin (SPI Driven) Addressable Pixel
These are high performance pixels that have high grain control of colour and brightness settings.
Please note the 3 models above are all the exact same pixel but made/trademarked by different companies. The APA102 was the original of these. Adafruit trademarked the name "Dotstar" to mean any of the above, whilst the SK9822 is a recent model made by another company.
I prefer these as they are higher performance. These pixels have 6 pins labeled as follows
- Ground - connected to common ground on the power supply rail
- Clock IN - Serial CLK signal input
- Data IN - Serial DAT signal input
- Clock Out - Serial CLK output INVERTED
- Data Out - Serial DAT signal output
- +5V - Connected to common +5V on the power supply rail
Driving these pixels requires a serial protocol that can be implemented easily in most programming languages. There are also a huge range of off the shelf drivers that we can use for this, I will talk about this later on. Talking to these pixels involves the creation of a string of bytes like so:
| Start Frame | Pix 1 GB Frame | Pix 1 Blue | Pix 1 Green | Pix 1 Red | ... | NEXT 4 bytes PIXEL DATA | ... | END Frame |
- Start Frame (32 bits): This frame tells the pixels that data is incoming. Its set to 32 x 0's
- Pix 1 GB Frame (8 bits): This frame allows you to control the global brightness level of this particular pixel win 32 increments. 223 = is the lowest brightness value and 255 is the highest
- Pix 1 Blue (8 bits): a value of 0 to 255 controlling this pixels BLUE level
- Pix 1 Green (8 Bits): a value of 0 to 255 controlling this pixels GREEN level
- Pix 1 Red (8 Bits): a value of 0 to 255 controlling this pixels RED level
- End Frame (32 bits): This frame of 32 x 1s is sent to indicate that all pixels need to apply the received data! This block is sent after all pixels have been addressed.
These pixels can be used for HUGE installations as they can be driven at very high frequencies. You can send data to the SK9822 pixel at a maximum of 30Mhz (30Mbit).
However, in reality, this rate is often far slower because it depends on a range of technical requirements. You need to make sure you have adequate power distributed to all your pixels, proper grounding and noise shielding, appropriate power buffering etc... Here are a a few links with the different densities. These come in pretty much the same densities as the Neopixel:
For the rest of this guide, we will be be using the SK9822 pixel, to keep it simple. It works for all use cases described. Specifically we will be using the SK9822 5050 (5x5mm) pixel