
Clip Renderer
The Clip Renderer allows for high quality rendering of your clips. This can be very useful if you want to make your own loops inside of Resolume or share your work with other VJ’s. It can also be used to convert files on the fly (although Alley has more options for conversion).
The Clip Renderer allows you to use Resolume as a production tool as well as a performance tool. Simply create loops and render them out.
Rendering VS Recording
But Mr. Resolume, how about the Record function?
The confusion in understandable so let’s compare the Clip Render to the Record function
The Clip Renderer will, as the name suggests, render a single clip.
The Record function will record your entire output instead.
The Clip Renderer will output clips of the exact length of that clip.
The Record function simply starts and stops with a button press.
The Clip Renderer works off-line. Meaning that the end result should be spot on, no missing frames etc. So you can render out smooth animations at any frame rate you like. This also enables you to make clips filled with effects that might not be stable enough for live use. Simply render the clip with all the effects and keep your GPU from smoking.
On the contrary, the Record function records your output, meaning that your frame drops are also recorded.
Rendering a clip
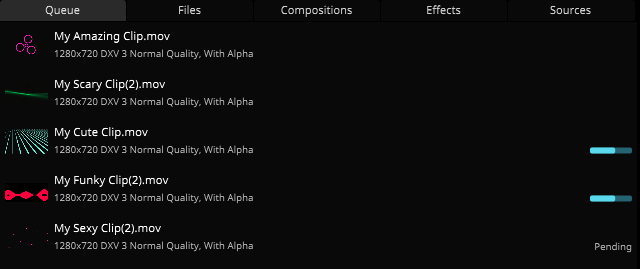
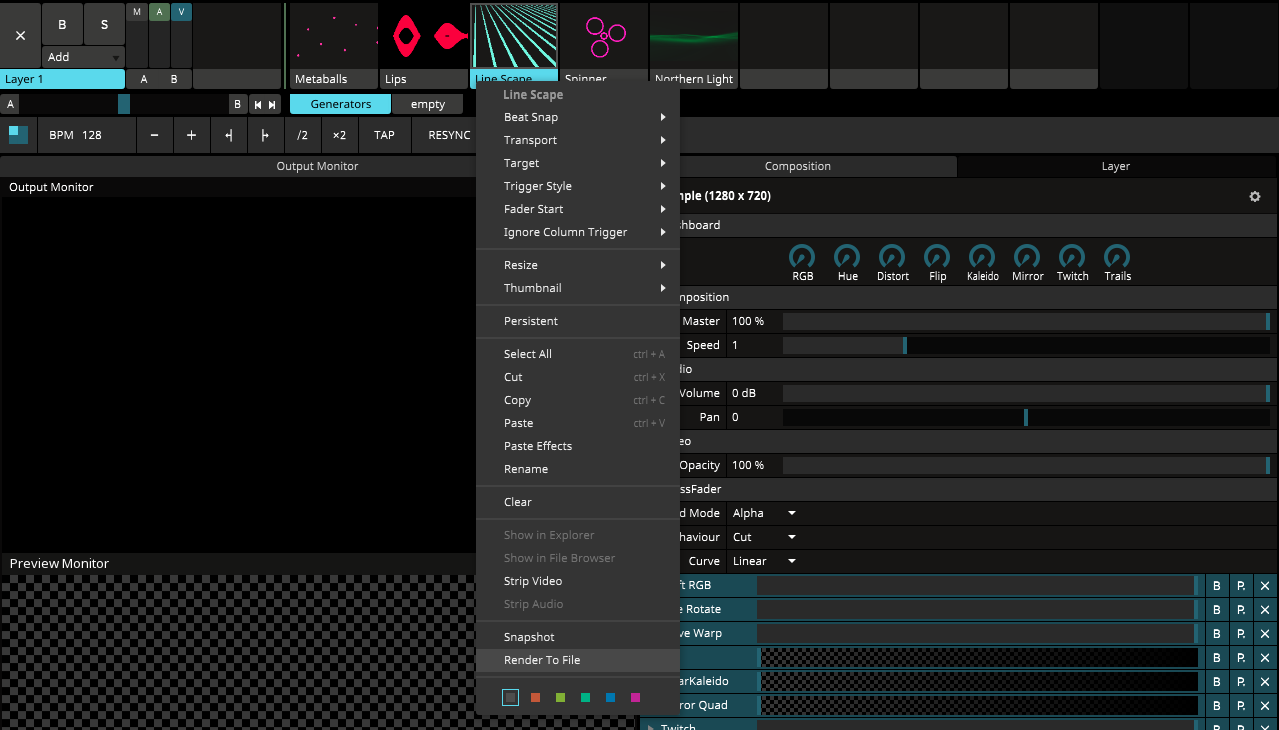
For basic usage right click on the clip you would like to render and select Render to File. The queue panel will pop up in your interface and your render will start.
After the clip is rendered you can drag it onto your composition to use it.
You may also double click the rendered file to preview the clip.
Press the folder icon to open the folder containing the render or press the cross to remove the clip from the queue. Note that this does not delete the file, but simply removes it from the queue
Instead of right clicking you can also simply drag the clip onto the queue to start rendering.
Resolution, Frame Rate and Speed
Although the Clip Renderer is a flexible system there are a few “rules” you should be aware of when you want to optimize your renders.
All clips are rendered at the composition resolution. The resolution can be changed in the composition settings here you’ll also find an option to change the frame rate of your composition.
By default the composition frame rate is set to auto. When you render a source with the frame rate set to auto the source will be rendered at 30 FPS. Files will be rendered at their original frame rate with the default settings. It is important to understand the differences between sources and files. Sources are clips that are made using Resolumes build in sources. Files are video's, images, audio and image sequences that are stored on your hard drive.
If you set your own custom frame rate in the composition settings Resolume will render both clips and sources at that frame rate.
The clip renderer will render a clip at that clip’s speed. If a clip has it’s speed set to 0, Resolume will treat it as if the speed is set to 1. Besides that, group speed and composition speed are ignored when rendering.
Only Clips with Transport set to BPM Sync or Timeline can be rendered, SMPTE, Denon etc transport types are not supported. Clips set to BPM Sync will be rendered based on the current global Tempo.
Limitations
By now you have realized that the Clip Render is really awesome. But even awesome has some limitations you should be aware of.
It is not possible to render live inputs like capture devices, NDI streams. The renderer needs a file or source to work with. For this reason the Feedback and Video router source can’t be rendered.
You can render video and video with audio but it is not possible to only render audio.
Composition/External FFT is not supported when rendering clips. Clip FFT can be used instead.
Preferences
To tweak the properties further we’ll have to dive into the preferences. Under Clip Rendering you’ll find additional settings for the renderer.
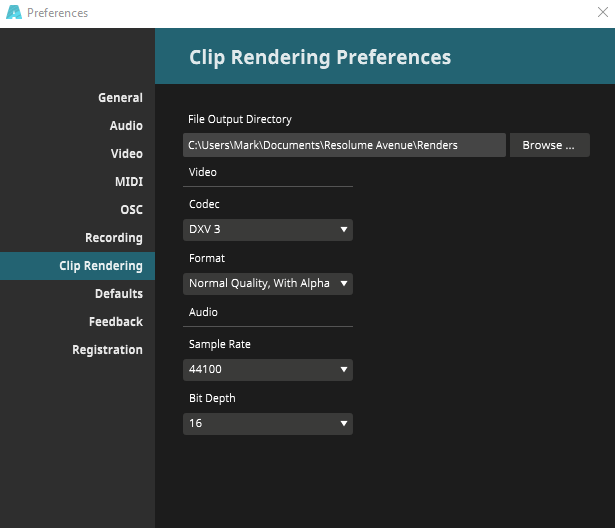
The File Output Directory is the directory where your renders are stored.
The codec is the codec used for your renders.
Use DXV for clips that you’ll use in Resolume.
Use MotionJPEG or ProRes when you want to work on your clips in other software.
Note that the DXV codec does work in Adobe After Effects and Premiere Pro.
Under format you can change whether to render at high or normal quality and whether to render the files with or without alpha. Rendering without alpha will reduce the file size but the clip will lose it’s transparency. If your content contains a lot of gradient colors it is best practice to switch to high quality to preserve these. If your clip doesn’t contain an Alpha channel you can select a format without Alpha to save on disk space and get faster render times.
Under Audio you can adjust the Sample Rate and Bit Depth to your needs.