User Interface
This article is here to help you understand the Wire interface. Most of the interface is very straightforward and easy to explore on your own, but there are a few nice tricks that we will teach here.
Welcome Screen
When you start Wire you will be warmly greeted by our welcome screen.
Under the Patches tab you can quickly jump into the latest patches you’ve worked on. Toggle between the clock and ABC symbol to display your last used patches or sort your collection alphabetically.
Click on the Tutorial tab to browse through an ever growing list of tutorials. These tutorials cover everything from the basics to generating nuclear launch codes.
The Examples tab hides a slew of fully documented patches that do awesome stuff. This is a nice tool for learning Wire or to pick up some inspiration.
The Templates tab holds a few templates that set Wire up for making a Source, Mixer or Effect.
At the left bottom you can toggle the Welcome pop-up on or off. The welcome screen can always be accessed from the View menu, because you, you are always welcome.
Patch Navigation
Panning
The "canvas" can be traversed by holding down the spacebar and click-dragging across the screen. The cursor will change into a hand, indicating that you are ready to pan. Alternatively you can press and hold the middle mouse button to pan.
Zooming
You can zoom in and out of your patch by scrolling the middle mouse button.
Alternatively you can use the [CTRL / ⌘] + [+]/[-] shortcuts to zoom in and out.
At the top right corner of the screen you will find a zoom level menu.
Here you can jump to preset increments or fit the patch to the screen.
The shortcut for fitting is [CTRL / ⌘] + [0].
The shortcut for resetting to 100% is [CTRL / ⌘] + [1].

Creating
Nodes can be created in different ways. The first method is to double click on an empty space. This opens up a search bar that lets you search for a node. Nodes found this way have a description and an example patch attached to them. Another method is to click on the library tab and either search or scroll to the desired patch, then drag it into the patch.
Selecting
Nodes can be selected by clicking on them. Hold [CTRL / ⌘] click on another node to expand your selection. Click and drag on an empty space in the patch to draw a selection box to select multiple nodes. The shortcut [CTRL / ⌘] + [A] can be used to select all nodes on the canvas.
The shortcut [CTRL / ⌘] + [SHIFT] + [A] can be used to select all unused nodes. This means that Wire will select all nodes that have nothing connected to them. This can be really useful to quickly clean up big patches and remove all unused nodes.
You can use the arrow keys to jump to nodes that are adjacent to the currently selected node.
Moving & Sorting
Once a node is selected you can move it around by clicking and dragging the node. When you have selected multiple nodes you can right click them to align them to the left or the top.
When multiple nodes are selected they can be auto-sorted using the shortcut [CTRL / ⌘] + [L]. When this command is used, Wire will try to make the selected part of the patch as neat as possible.
Duplicating
Once a node is selected you can right click it and select duplicate to create a duplicate of the node. Alternatively you can press [CTRL / ⌘] + [D] to create a duplicate, or hold [ALT] and drag out a duplicate.
Copying/Cutting/Pasting
Nodes can be copied, cut and pasted in your patch or onto other patches. Right click the node and press copy, cut or paste. The shortcuts are [CTRL / ⌘] + [C] for copy, [CTRL / ⌘] + [X] for cut and [CTRL / ⌘] +[V] for pasting.
You may notice the option “Copy For Sharing”. This is a way to share your patch with other people by means text. We’ll dive deeper into this feature in the Saving, Consolidating and Compiling article.
Another nifty trick is the Copy/Paste Settings function. This allows you to copy the settings from one node to another. For example: copying the settings from a Sine Oscillator onto a Saw Oscillator.
Renaming
You may want to rename your nodes at some point. You can do this by double clicking its name. You can change the name in the node panel. The shortcut for renaming is [CTRL / ⌘] + [SHIFT] + [R].
Input nodes can be renamed in the dashboard channel.
When editing multiple nodes at once you can either give all the nodes the same name or use the multi-edit icon in the patch panel to edit the individual names
Note that the name of a input node will also be displayed in Resolume when using the patch. For this reason it is best practice to use short English words if you want to share your patch with others.

Connecting
Nodes can be connected by clicking on an outlet and connecting it to an inlet. Wire always works from left to right. In some cases, feedback loops can be created, but that is beyond the scope of this article.
You can take the connection to an inlet and move it to another inlet by clicking it.
To disconnect a connection, right click on the wire and select disconnect. Alternatively you can press [DEL] or [BACKSPACE] to remove the connection.
Deleting
It is impossible to delete a node.
Deleting nodes is not permanent enough.
That is why in Wire, you destroy nodes instead.
Right click the node and click on destroy.
Alternatively press [DEL] or [BACKSPACE] to initiate node destruction.
Undo/Redo
When you have made some terrible mistake you can always undo or redo your actions by clicking the curved arrows under the Wire tab. The shortcut for undo is [CTRL / ⌘] + [Z]. The shortcuts for redo are [CTRL / ⌘] + [SHIFT] + [Z] or [CTRL / ⌘] + [Y].
Volume Control
When there is an Spectrum In node present in the patch, the volume slider will pop up next to the zoom indicator. A big red warning triangle will pop up if you don't have an audio output device selected. If this is the case, navigate to Wire > Settings > Audio and select one.
 Big red warning icon telling us to select an audio output device in the Preferences
Monitor
In the bottom right corner of your screen you will find the monitor. By default this will show the output of the currently selected node. This allows you to preview every step in your signal without having to bypass nodes.
Below the monitor the name of the node will be displayed.
Left of the name you’ll find the pin button. When in pinned mode the current node will be locked to the monitor. No matter what you do or where you click, this node will always be in the preview screen.
Right clicking on the monitor (the name) allows you to hide, duplicate or undock your monitor. Using these tools you can create a monitoring setup that suites you the best.
Right clicking on the monitor (the image), allows you to copy the current frame as an image. Which you can paste anywhere you like. Hitting the cogwheel icon at the bottom right corner gives you the same options and then some. Here you can also choose to Snapshot the monitor, this creates a image node containing the captured frame. Finally, you can set the default background color of the monitor to either transparant or black.
 The Texture In node is pinned to the preview screen.
Patch Panel
The patch panels gives you all the information about your patch in general.
Here you can give your patch a name and a description. This is the name and description that Arena/Avenue will use. Category is an important one, here you select how Arena/Avenue should interpret your patch. You can choose between source, effect or mixer. If needed, you can adjust the resolution and texture bit depth of the patch.
Below that you can fill in your credentials. This will make sure you get famous.
Lastly there is your license information. This will be covered in more detail in the Saving, Consolidating and Compiling article.

Node Panel
After you select a node, the node panel will update to display the unique attributes of that node. Keep in mind that each node is unique and will have different settings in the panel
Here you can change the name of the node and adjust inlet values manually.
The color of the node can also be adjusted here.
When editing multiple nodes at once, the color will be assigned to all selected nodes.
Under attributes you can often adjust the data input and output types and change the amount of instances. Data types will be covered in the Data Types article and Instancing also has its own article.
At the bottom of the panel you will find a link to an example that explains the node in more detail.

Library
The library is the collection of all the nodes in Wire. Here you can either search for the node you need. Create the node by either double clicking it or dragging it onto the patch.

Resources
Resources are external files used in your patch. These can be clips, images or ISF files. The resource tab is here to give you an overview of all resources used in your patch.

Consolidation
When saving a patch that has resources, it might be useful to consolidate it instead. This will copy all the used resources to the folder where you patch is saved. For more information on consolidation check the Saving, Consolidating and Compiling article.
Notes
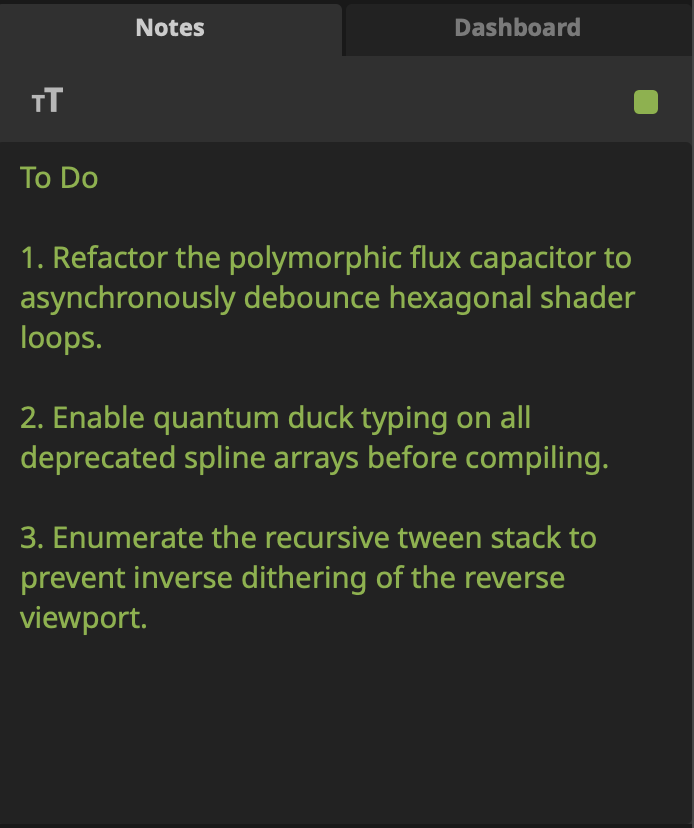
The notes panel (that is notes, not nodes!) allows you to take some quick notes. Useful for remembering stuff, storing bits of patch (use 'copy for sharing' to copy nodes as text) and making to do lists
Log
This is where all the error messages show up. A clear Log is a happy Log. You can also use the Print node to send information to the Log.
Dashboard
The Dashboard tab is the one-tab-stop for controlling all your inputs as well as ordering them as you see fit. This is also the place to be for creating presets.
The order of the inputs is also the order that Arena/Avenue will pick up when you run your patch there. Inputs can be moved by dragging and dropping the name of the parameter.
You can also let Wire sort your parameters for you. Hit the cogwheel icon to find the sorting options.
Additionally, in the same cogwheel-menu, you'll find the option to create input groups. These are containers that can hold multiple input nodes. Groups will show as a foldable sections in Arena & Avenue. Patches with a lot of parameters will greatly benefit from the use of groups as you can now categorize them as you see fit.
Note that to create an organised and user-friendly patch you should always rename your inputs. You can rename nodes by either double clicking the name of the node (either on the dashboard, or the node self) or right clicking the node and selecting rename in the drop-down menu.
Clicking on a node in the dashboard panel that is currently not visible on the canvas will move the camera to that node.
 Presets
To create a preset for your patch; hit the P-icon next to the cogwheel.
Here you can save, load and manage presets.
The manage option will show you the preset manager.
Here you can save, rename and delete your presets.
Presets made in Arena and Avenue will also be visible here, but cannot be edited.
Note: the name "Default" cannot be used for a preset as it will be used for the saved state of the Wire patch.


Stats
The Stats Panel will give you information about how much each node is loading your system. This is a useful panel when debugging your patch as it helps you to find bottlenecks.
Clicking on NAME, CATEGORY, LOAD or VERSION allows you to sort the stats panel based on that parameter. Click the name of a node to select it, the node will be shown in the Node panel and the patch view wil center to this node so you can she where in the patch is it.
Node Search
CMD/CTRL + F
Especially in a big patch searching is a very fast way to find the node you're looking for. Hit CTRL + F on Windows and ⌘ + F on macOS. The Stats panel will focus and you can start typing straight away. All nodes matching your search query will be listed. Click the one you're looking for and it will be highlighted in the patch and the Node panel.