The End is Near, Fresh Footage For Your NYE Gig
We are rapidly approaching the end of 2013. The year always ends with the best party; New Years Eve! The NYE gig is always a special one, everybody comes out to party and you get paid trippple, right?
Make that NYE gig a special one and get some fresh footage. We have Luminator dropping a successor with Lumotion 2. Laak gives you the versatile VJSurvivalKit and STV releases the colorful StripeTease.
LuMotion 2 VJ Footage by Luminator
VJSurvivalKit VJ Footage by Laak
StripeTease VJ Footage by STV in Motion
Resolume Blog
This blog is about Resolume, VJ-ing and the inspiring things the Resolume users make. Do you have something interesting to show the community? Send in your work!
Highlights
The Light Cycle - Mobile Projection Mapping
From the wonderful folks at Urban Projections comes this lovely project using Tagtool, Arena and a cargo bike. What's not to love?
The Light Cycle.
The Light Cycle is a bike with personality. Housing a high power, 6000 ansi lumen projector, sound system, ipad and battery pack, it is a fully mobile, street art device. It aims to provide an innovative means for taking digital art into public spaces and out onto the streets.
Created by Urban Projections, the Light Cycle has been used to illuminate streets with colourful digital artwork and animation. [fold][/fold] The company have been working with young people from various towns and cities, to breathe life back into disused areas, through interactive projection workshops.
The system runs from battery, with a flexible life span of between one to three hours. It can also run directly from mains electricity for the more permanent positions. Artwork is created though a live drawing and animating application on the ipad called Tagtool. A Macbook Pro runs Resolume Arena for more complex visual setups.
The light cycle was created by Urban Projections and was funded by Nottinghamshire County Councils ‘Nottinghamshire Arts Fund’. It’s journey can be followed on it’s blog: http://www.thelightcycle.com.
The light cycle is available for hire and involvement with creative projects, contact [email protected]
Urban Projections are an arts organisation based in Mansfield, but whose work spans across the U.K and Europe. They provide innovative performance opportunities, workshops and creative projects to organisations, companies and brands. Their previous work includes collaborations with the BBC, Vauxhall, The Saatchi Gallery and The British Red Cross.
The Light Cycle.
The Light Cycle is a bike with personality. Housing a high power, 6000 ansi lumen projector, sound system, ipad and battery pack, it is a fully mobile, street art device. It aims to provide an innovative means for taking digital art into public spaces and out onto the streets.
Created by Urban Projections, the Light Cycle has been used to illuminate streets with colourful digital artwork and animation. [fold][/fold] The company have been working with young people from various towns and cities, to breathe life back into disused areas, through interactive projection workshops.
“Our aim is to use innovative methods to bring art into public spaces and onto the streets. We love the fact that we can transform unused spaces into places of temporary beauty. It’s always great to see the reactions of unsuspecting passers-by” - Bec Smith, Creative Director, Urban Projections.
The system runs from battery, with a flexible life span of between one to three hours. It can also run directly from mains electricity for the more permanent positions. Artwork is created though a live drawing and animating application on the ipad called Tagtool. A Macbook Pro runs Resolume Arena for more complex visual setups.
“We’ve designed the bike with precision in mind, so that we can also execute mobile mapping projects. The projector has a fully adjustable, tilt and pan mount, as well as four leveling feet around the bike, so that we can ensure stability and accuracy”.
The light cycle was created by Urban Projections and was funded by Nottinghamshire County Councils ‘Nottinghamshire Arts Fund’. It’s journey can be followed on it’s blog: http://www.thelightcycle.com.
The light cycle is available for hire and involvement with creative projects, contact [email protected]
Urban Projections are an arts organisation based in Mansfield, but whose work spans across the U.K and Europe. They provide innovative performance opportunities, workshops and creative projects to organisations, companies and brands. Their previous work includes collaborations with the BBC, Vauxhall, The Saatchi Gallery and The British Red Cross.
Happy Thanksgiving 2013!
When we first started working on Resolume, VJ’ing was an underground culture. VJs were people who loved to do what they do, who just loved to drag projectors and computers around, show after show, weekend after weekend. If there was any form of payment, it was often just a crate of beer which doubled as a "desk" to put their laptops on.[fold][/fold]
Since then we’ve seen the scene grow to heights nobody could have imagined back then. Huge LED screens now take up the stage designs of every music festival. Projection mapping on custom geometry is a staple of the DJ booth in every club. Around the world, visual artists are setting fire to every room and facade with beautiful glowing pixels. Some of the people playing from that beer crate 15 years ago are now flying across the world in private jets accompanying superstar DJ's.
We should never forget who we are and where we come from. So this weekend we give thanks to the old people that have pushed the visual arts to such great heights. And to the new people that will continue to push it in untold directions. We love the path we have walked together with you for almost 15 years now and we're curious to see where it will take us in the future.
Thank You!
The discount deal is over, please do not email us that you just missed it, because you just missed it.
Awesome Set of Projection Mapping Tutorials
Get out your projector, fire up Arena and Cinema4D, brew a pot of coffee and start your week creatively!
Coming to you courtesy of the amazing Tom Watkins / VJFit from Fit Motion Graphics, Tom covers everything you need to know, nothing you don't. He doesn't waste a second and he knows what's up.
Starting off with some basic video warping in Resolume, he gets some trippy stuff going using only Resolume, which we likey.
Then he brings in Cinema4D to take you into the third dimension.
And he tops it off with an excellent and precise way to model your physical object in Cinema and align your projector/camera settings.
This world is a better place with people like Tom in it.
[fold][/fold]
New Footage Releases - Original Pixel Gangstaz
As far back as I can remember, I've always wanted to be a pixel gangster.
Crashing hotel rooms and swinging the Goose. Pimping out those RGBs and straight up hustling video adapters. Chasing the pixel perfect dragon.
One day, some of the kids from the neighbourhood carried my mother's LED panels all the way home. You know why? It was outta respect.
This release shows two pixel OGs dropping their stuff like it's hot and introduces one new player to the game.
Make no mistake, the pixel gangster game is played for keeps. You can't come playing those same old clips with those same old effects. Step it up son.
Video2000 is a certified OG of the pixel game. He's got street cred written all over his gold teeth.
www.resolume.com/footage/symytroid
ILQC is the new kid on the block, but you can be sure he don't take no D from Donnie.
www.resolume.com/footage/pinkeddy
Unit44 is so OG, they should be called OG-Unit. Dog.
www.resolume.com/footage/enter
New Footage Releases - Heads And The City
We love themed releases, so we're extra happy to bring you some city flythrough based packs from Dan Wise and Daniel Knight, plus some high tech HUD goodness from newcomer Laak.
You need this: http://www.resolume.com/footage/globalnetwork
You want this: http://www.resolume.com/footage/neotron
You play this: http://www.resolume.com/footage/headsup
You need this: http://www.resolume.com/footage/globalnetwork
You want this: http://www.resolume.com/footage/neotron
You play this: http://www.resolume.com/footage/headsup
Projections as Light: Nonotak
NONOTAK is a collaboration between Noemi Schipfer, illustrator and Takami Nakamoto, musician and architect.
Music to our ears! For more info on Nonotak's latest project Late Speculation: http://www.nonotak.com/latespeculation.htm
We are interested in the relationship between space, light and sound. We try to express it through installations or audiovisual performances.
Over the past 2 years, we essentially worked on installations such as "ISOTOPES V.02" which was shown at Mapping Festival 2013 in Geneva. Each of our installations tries to create dematerialized spaces that can be controlled.
We wanted our visual compositions to go beyond the 2nd dimension, as if we were playing with an architecture made of light. This is also why most of our work is monochrome, we consider projections as light and not videos.
In order to make it possible we are projecting our visuals on different kind of textiles in order to make them look like holograms.
The technique used is projection mapping, obviously. The project Late Speculation is our first step into more improvisational live performance, where audiovisual elements are no longer looped like installations, but rather created in the moment. Each performance could have its own variations, generating different results, with an element of surprise even for the performers themselves.
 Viewed 15353 times")
Achieving this with Resolume worked like a charm. Resolume (especially the last one which fixed some speedy midi issues) is a really complete software for this kind of "live" purpose.
Basically we are using Ableton Live for the audio and sending midi to Resolume. The midi sent from Ableton is "written" and the same each time we are playing a song. But with some Max for Live patches and Ableton devices we are able to change midi notes and channels that are sent to Resolume. This is how we simply trigger different decks from a single midi note in order to create controlled variation that we can trigger via midi knobs.
Those "midi triggered" parts are basically After Effects compositions that we load into Resolume. Some parts of the project are made on Quartz Composer, but no panic because Resolume is able to load the patches and even load the sliders created on QC so we can easily map them to midi controllers! This kind of "highly" synced set up needs A LOT of Resolume decks and we were really impressed by the amount the software was able to handle according to our laptop setup.
There is one link that helped us a lot connecting some part of Resolume with Ableton for live purpose : https://resolume.com/blog/8717/max-for-live-resolume-patches This way I (Takami) am even able to send information to Noemi's Resolume from my Akai mpd32, so visuals can react with the effects I'm playing in Live.
In terms of projection mapping, Resolume does an awesome job by having output transform, warping, multiple layers, screens and slices options included. We are using 2 projectors and sometimes we are projecting the same visual from both of the projectors but they also act separately, one is off while the other one is on and this was easy to achieve within one unique software.
 Viewed 15353 times")
Performance setups need to be away from lag and bugs, thats why running only Resolume for the visual content was quite reassuring.
Music to our ears! For more info on Nonotak's latest project Late Speculation: http://www.nonotak.com/latespeculation.htm
Resolume 4.1.7 Released - Resolume Noir
From the files of Resolume, Private Investigator:
"The moment the dame walked in, I knew she meant trouble. I should have never taken the job, but I needed the money. Besides, I'm a sucker for a sweet smile and a twirl of the hips.
[fold][/fold]
I figured it would be an open and shut case of keeping an eye on the husband. Spend a few nights shadowing the guy. Find out where he was spending all his late nights, coming home smelling of expensive liqour and traces of lipstick on his collar.
Turns out there was more to it than that. The dame asked me to check out a gang of bugs. A particularly nasty gang of bugs going by the name of the Shifty Boys.
I found the bugs hanging out in a shady bar called Kernel. I didn't like the looks of them. Not one bit. I took a deep breath, made sure my .45 was loaded. Then I entered the dive…"
Resolume 4.1.7 is a tough as nails PI, that always gets the job done, no matter what.
http://www.resolume.com/download
New Features
[NEW] Enttec USB Pro MK2 support
[NEW] SMPTE input visible in status bar (bottom right)
[NEW] Increase SMPTE input delay compensation to -5000 and +5000 ms
[NEW] Buffered effects (like Trails, RGB Delay and Stop Motion) now flush their buffer after 1 second
New Effects
[NEW] Jitterbug transition - Like TimeSwitcher, only better.
[NEW] Tint - Like Colorize, only better.
[NEW] MirrorQuad - Like Mirror, only better.
Improvements and important bug fixes.
[FIXED] Flash no worky on the Mac
We now include the flash player in the .app bundle so on the mac Resolume does not depend on the flash player that is installed on the system.
[FIXED] Crash when creating new composition, resizing composition and opening midi map
This was a huge thorn in our eye for a long time. Luckily we were finally able to get our hands on a machine that had the problem, and we fixed it up good.
[NEW] Implement latest Enttec DMX USB PRO API (ftd2xx.lib)
This is tech talk that basically means we now speak the same language as Enttec themselves. Entteccian.
[NEW] Layer Opacity 0 = Bypass
When the opacity of a layer is 0 it's not rendered anymore. This can give a huge speed improvement, especially on hi-res compositions with a lot of layers.
Bug Fixes
[FIXED] Strobe effect and plugin do not respect alpha
[FIXED] Hue rotate doesn't like pink
[FIXED] File relocating on PC
[FIXED] Repeatedly triggering a clip with the enter key and receiving midi causes a freeze
[FIXED] Having a slash in comp name doesn't save
[FIXED] Piano mode for beatloopr doesn't really work intuitively
[FIXED] Double clicking a comp file in Finder/Explorer still opens the last loaded comp
[FIXED] Soft-edge with 3 or more overlaps is broken
[FIXED] MIDI is acting weird again ( sigh )
[FIXED] Matrox capture source crashes arena
[FIXED] Windows SHIFT lock SHIT
[FIXED] Video card engine couldn't start when Wait for Vertical Refresh & OpenGL Triple Buffering is On
[FIXED] There's no place like 10.0.0.127, Dorothy
New Footage Releases - Attack of the Plexified Robot Vectors
These three releases are extra special! Not only do we have two new artists who are sharing their skills with you, we also have the highly anticipated second release by best-seller Luminator. Apparently good things come in twos.
Luminator gets on point, plexus style.
http://www.resolume.com/footage/lupoint
Ghosteam drops some logic, robo style.
http://www.resolume.com/footage/robologic
And STV in Motion takes the center, vector style.
http://www.resolume.com/footage/vectorius
Luminator gets on point, plexus style.
http://www.resolume.com/footage/lupoint
Ghosteam drops some logic, robo style.
http://www.resolume.com/footage/robologic
And STV in Motion takes the center, vector style.
http://www.resolume.com/footage/vectorius
New Workshop Sessions Coming This November 2013
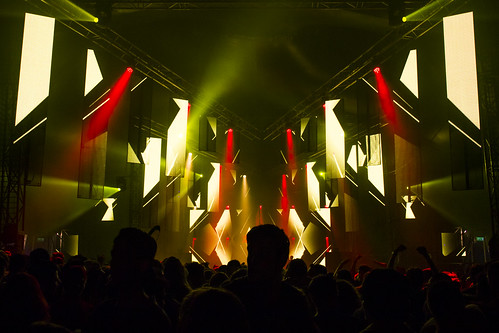
KBK Visuals at Soenda Festival 2013, Komodo Stage 18-05-2013. Photo by Jessica Dreu.
Big stage envy? Don't get mad, get educated!
[fold][/fold]
Getting Started Resolume Workshop
5 hours. From zero to hero. No experience required.
This workshop teaches you all you need to know to start VJ'ing with Resolume. We go over what does what in the interface, and show you the best ways to use it. Starting with the basics on how to load and trigger clips, you'll be compositing multiple videos, applying realtime effects and using live cameras in no time. First hand knowledge from the developers themselves will make sure you'll pick up a few things even the pros don't know about. The focus will be on practical knowledge and skills, and we'll show you how to best prepare your footage, how to connect to a projector, and before the day is over, you'll be VJ'ing on the big screen yourself!
Monday 4 November 2013
€ 150.00 Euro
Advanced Resolume Workshop
5 hours. Basic experience required.
This is for everyone who already has some experience with VJ'ing in general, but wants to get to the nitty gritty of the many options Resolume has to offer. Sync clips to the BPM or have effects pop to the music. Use Cue Points and the Beatloopr to remix your footage on the fly. Streamline your signal flow and get your compositions and decks organized. We'll go over every nook and cranny, and leave no stone unturned. At the end of the day, not only will Resolume have no more secrets to you, you'll also have the skills to take your visual sets to the next level.
Tuesday 5 November 2013
€ 200.00 Euro
Live performance with Resolume
5 hours. Basic experience required.
Okay. So you know the basics. You know which buttons to push and how to control effects in realtime. But when do you push that button? And which effects do you apply where? And how to map that shiny new midi controller or iPad? This workshop will show you how you can setup Resolume so that you can quickly improvise to changes in the music. Allowing you to focus on being creative with your content, instead of trying to remember which button does what.
Wednesday 6 November 2013
€ 200.00 Euro
Projection Mapping with Resolume Arena Workshop
5 hours. Advanced experience required.
Warning, when this workshop is over, you'll never again be able to look at the objects around you without trying to warp video on them in your head. Projection mapping has been the buzz word in the land of live visuals for a while now, and after this workshop you can get in on the hype too. We'll go over the basic tools you have at your disposal when mapping with Resolume. Using the powerful warping features of Arena 4.1, you can tackle any surface. And if one projector wasn't enough, we'll show you how to extend your maps across multiple projectors.
Thursday 7 November 2013
€ 200.00 Euro
Sign up at https://resolume.com/shop/workshops.php